Step by step Installation and configuration of Oracle Database 11g R2 on OEL with ASM
This post will give the details step of Oracle Database 11g R2 installation on OEL with ASM.also how to create a disk and disk group for ASM.
Automatic Storage Management (ASM) will be used as the file system and volume manager for Oracle Database files (data, online redo logs, control files, archived redo logs), and the Fast Recovery Area.
Automatic Storage Management (ASM) will be used as the file system and volume manager for Oracle Database files (data, online redo logs, control files, archived redo logs), and the Fast Recovery Area.
Installation Step:
1. Installing Oracle Enterprise Linux and creating virtual hard disks in VMware for ASM disks
2. Creating recommended OS groups and user for Grid Infrastructure
3. Creating login scripts for grid and oracle users
4. Installing Oracle ASM packages
5. Creating ASM disk volumes
6. Installing Oracle Grid Infrastructure software
7. Creating ASM disk groups
8. Installing Oracle database software and create database instance
>> Installing Oracle Enterprise Linux and creating virtual hard disks in VMware for ASM disks
Installation of the Oracle Enterprise Linux in VMware environment has been described in the following article: http://emarcel.com/installing-oracle-linux-in-vmware-virtual-machine/
Once we have Oracle Linux up and running we have to
shut it down and create virtual hard disks which will be used for ASM
disk groups.
We are going to create three virtual hard
disks with the below names:
1 CRS1 (100 MB)-for CRSVOL1 disk where Cluster Ready
Services (CRS)
files will be stored. CRS provides many system management services and
interacts with the vendor clusterware to coordinate cluster membership
information.
2 DATA1 (10 GB)-disk
for DATAVOL1 disk. Here
database will keep all datafiles, control files, Redo log files.
3 FRA1 (10 GB)-disk
for FRAVOL1 disk for
database Fast
Recovery Area (FRA)
files. For example: database backup files, copy of database control files.
Open virtual machine properties
window and use wizard to create new virtual hard disks:
Once virtual hard disks have been created power on virtual machine and let the Oracle Linux start.
>> Creating recommended OS groups and user for Grid Infrastructure:
For ASM instance it
is recommended to use separate user from an oracle user.
Create user “grid”,next
create ASM_HOME directories for clusterware software.
[root@oracleasm ~]# groupadd–g
1200 asmadmin
[root@oracleasm ~]# groupadd–g
1201 asmdba
[root@oracleasm ~]# groupadd–g
1202 asmoper
[root@oracleasm ~]#
[root@oracleasm ~]# useradd–m –u
1100 –g oinstall –G asmadmin,asmdba,asmoper –d /home/grid –s /bin/bash grid
[root@oracleasm ~]#
[root@oracleasm ~]# id grid
uid=1100(grid)
gid=54321(oinstall)
groups=54321(oinstall),1200(asmadmin),1201(asmdba),1202(asmoper)
[root@oracleasm ~]#
[root@oracleasm ~]# passwd grid
Changing password for user grid.
New UNIX password:
BAD PASSWORD: it is too short
Retype new UNIX password:
passwd: all authentication
tokens updated successfully.
[root@oracleasm ~]#
Creating directories for grid home
[root@oracleasm
~]# mkdir–p /u01/app/grid
[root@oracleasm
~]# mkdir–p /u01/app/11.2.0/grid
[root@oracleasm
~]# chown–R grid:oinstall /u01
[root@oracleasm
~]#
Also now we can create directories for Oracle database installation.
[root@oracleasm ~]# mkdir–p
/u01/app/oracle
[root@oracleasm ~]# chown
oracle:oinstall /u01/app/oracle
[root@oracleasm ~]# chmod–R 775
/u01
[root@oracleasm ~]#
NOTE:
We have to assign
oracle user also to asmdba group in order to allow oracle user to discover asm
disks during the database creation. Oper group will be used by oracle software.
(solution
for an issue while dbca doesn’t see ASM disks, this issue might happen when we
use separate accounts for managing ASM as a grid and an oracle account to
manage database instance)
[root@oracleasm
~]# groupadd–g 1301 oper
[root@oracleasm
~]# usermod–g oinstall –G dba, oper, asmdba oracle
[root@oracleasm
~]#
Creating
login scripts for grid and oracle users
Login script for an oracle user:
Switch to an oracle
user and edit .bash_profile file
[root@oracleasm ~]# su – oracle
[oracle@oracleasm ~]# echo>
.bash_profile
[oracle@oracleasm ~]# vi
.bash_profile
Paste the following
configuration and save the file .bash_profile
Login script for a grid user:
Switch to an oracle
user and edit .bash_profile file
[oracle@oracleasm ~]# su – grid
Password:
[grid@oracleasm ~]# echo>
.bash_profile
[grid@oracleasm ~]# vi
.bash_profile
Paste the following
configuration and save changes in .bash_profile file
Set Resource Limits for the Oracle Software
Installation Users
To improve the
performance of the software on Linux systems, you must increase the following
resource limits for the Oracle software owner users (grid).
For oracle user it
has been automatically setup by the oracle-validated tool.
To make these
changes, run the following as root:
Add the following
lines to the /etc/security/limits.conf file (the following
example shows the software account owner grid):
[root@oracleasm ~]#
vi /etc/security/limits.conf
grid
soft nproc 2047
grid
hard nproc 16384
grid
soft nofile 1024
grid
hard nofile 65536
save
it
Add or edit the
following line in the /etc/pam.d/login file, if it does not
exist:
[root@oracleasm ~]# vi
/etc/pam.d/login
session required
pam_limits.so
save
it
Depending
on your shell environment, make the following changes to the default shell
startup file, to change ulimit setting for all Oracle installation owners (note
that these examples show the users oracle and grid):
For
the Bourne, Bash, or Korn shell, add the following lines to the /etc/profile
file by running the following command:
Adjust /etc/hosts file:
Make sure that hosts
file have right entries (remove or comment out line with ipv6), assign proper
IP to host:
# Do not
remove the following line, or various programs
# that
require network functionality will fail.
127.0.0.1 localhost.localdomain localhost
::1 localhost6.localdomain6 localhost6
192.168.44.128
oracleasm.localdomain oracleasm
Save
it.
>> Installing Oracle ASM packages:
Oracle Linux is up and running, now we can install the oracleasm-support and oracleasm packages.
Login as a root user,
mount Linux ISO image as a cd-rom (image also mounted in VMWare virtual cd-rom)
device and install packages.
[root@oracleasm
Server]# ls -l oracleasm*
-rw-r--r-- 1 root
root 136932 Jul 26 2011
oracleasm-2.6.18-274.el5-2.0.5-1.el5.x86_64.rpm
-rw-r--r-- 1 root
root 138929 Jul 26 2011
oracleasm-2.6.18-274.el5debug-2.0.5-1.el5.x86_64.rpm
-rw-r--r-- 1 root
root 136804 Jul 26 2011
oracleasm-2.6.18-274.el5xen-2.0.5-1.el5.x86_64.rpm
-rw-r--r-- 1 root
root 89845 Apr 6 2011
oracleasm-support-2.1.7-1.el5.x86_64.rpm
One more package we have to
install is oracleasmlib:
We do not have ULN access right now.
Getting ASMLib without a
ULN Subscription
Non-subscribers are free to use the
similar package built for RHEL on their Enterprise Linux machines.
Go to Oracle
Technology Network
and download oracleasmlib package from RHEL 5 section:
Copy package to oracle server into /tmp directory and install it:
[root@oracleasm u01]# ll
[root@oracleasm u01]# rpm -Uvh oracleasmlib-2.0.4-1.el5.x86_64.rpm
--nodeps
warning: oracleasmlib-2.0.4-1.el5.x86_64.rpm: Header V3 DSA signature:
NOKEY, key ID 1e5e0159
Preparing...########################################### [100%]
1:oracleasmlib########################################### [100%]
[root@oracleasm u01]#
UPDATE:
If missing the
unixODBC package (32bit) also has to be installed:
[root@oracleasm
u01]# rpm -Uvh unixODBC-2.2.11-10.el5.i386.rpm --nodeps
warning:
unixODBC-2.2.11-10.el5.i386.rpm: Header V3 DSA signature: NOKEY, key ID
1e5e0159
Preparing...###########################################
[100%]
1:unixODBC###########################################
[100%]
[root@oracleasm
u01]#
Configuring and load the ASM kernel module (as the “root” user).
[root@oracleasm u01]# /usr/sbin/oracleasm configure -i
Configuring the Oracle ASM library driver.
This will configure the on-boot properties of the Oracle ASM
library
driver. The following
questions will determine whether the driver is
loaded on boot and what permissions it will have. The current values
will be shown in brackets ('[]').
Hitting <ENTER> without typing an
answer will keep that current value. Ctrl-C will abort.
Default user to own the driver interface []: grid
Default group to own the driver interface []: asmadmin
Start Oracle ASM library driver on boot (y/n) [n]: y
Scan for Oracle ASM disks on boot (y/n) [y]: y
Writing Oracle ASM library driver configuration: done
[root@oracleasm u01]#
The script completes the following tasks:
- Creates the /etc/sysconfig/oracleasm configuration file
- Creates the /dev/oracleasm mount point
- Mounts the ASMLib driver file system
Enter the following command to load the oracleasm kernel module:
[root@oracleasm
u01]# /usr/sbin/oracleasm init
Creating
/dev/oracleasm mount point: /dev/oracleasm
Loading
module "oracleasm": oracleasm
Mounting
ASMlib driver filesystem: /dev/oracleasm
[root@oracleasm
u01]#
>> Creating ASM disk volumes:
Let’s
take a look at the available disks in Oracle Linux (remember we have created
three additional disks for ASM)
[root@oracleasm
~]# fdisk -l
Disk /dev/sda:
64.4 GB, 64424509440 bytes
255 heads, 63
sectors/track, 7832 cylinders
Units = cylinders
of 16065 * 512 = 8225280 bytes
Device Boot Start End Blocks
Id System
/dev/sda1 *
1 13 104391
83 Linux
/dev/sda2 14
7832 62806117+ 8e
Linux LVM
Disk
/dev/sdb: 103 MB, 103809024 bytes
64 heads, 32
sectors/track, 99 cylinders
Units = cylinders
of 2048 * 512 = 1048576 bytes
Disk /dev/sdb
doesn't contain a valid partition table
Disk
/dev/sdc: 10.7 GB, 10737418240 bytes
255 heads, 63
sectors/track, 1305 cylinders
Units = cylinders
of 16065 * 512 = 8225280 bytes
Disk /dev/sdc
doesn't contain a valid partition table
Disk
/dev/sdd: 10.7 GB, 10737418240 bytes
255 heads, 63
sectors/track, 1305 cylinders
Units = cylinders
of 16065 * 512 = 8225280 bytes
Disk /dev/sdd
doesn't contain a valid partition table
Disk /dev/dm-0:
62.1 GB, 62176362496 bytes
255 heads, 63
sectors/track, 7559 cylinders
Units = cylinders
of 16065 * 512 = 8225280 bytes
Disk /dev/dm-0 doesn't
contain a valid partition table
Disk /dev/dm-1:
2113 MB, 2113929216 bytes
255 heads, 63
sectors/track, 257 cylinders
Units = cylinders
of 16065 * 512 = 8225280 bytes
Disk /dev/dm-1
doesn't contain a valid partition table
[root@oracleasm
~]#
We’ve got three new disks
available for ASM disks:
Disk
/dev/sdb: 103 MB, 103809024 bytes
Disk
/dev/sdc: 10.7 GB, 10737418240 bytes
Disk
/dev/sdd: 10.7 GB, 10737418240 bytes
First we have to create partitions to be able to use
those disks as ASM disks;
Disk /dev/sdb:
(100MB)
[root@oracleasm ~]#
fdisk /dev/sdb
Device contains
neither a valid DOS partition table, nor Sun, SGI or OSF disklabel
Building a new DOS
disklabel. Changes will remain in memory only,
until you decide to
write them. After that, of course, the previous
content won't be
recoverable.
Warning: invalid flag
0x0000 of partition table 4 will be corrected by w(rite)
Command (m for help):
n
Command action
e extended
p primary partition (1-4)
p
Partition number
(1-4): 1
First cylinder (1-99,
default 1):
Using default value 1
Last cylinder or
+size or +sizeM or +sizeK (1-99, default 99):
Using default value
99
Command (m for help):
w
The partition table
has been altered!
Calling ioctl() to
re-read partition table.
Syncing disks.
[root@oracleasm ~]#
Disk /dev/sdc: 10GB
[root@oracleasm
~]# fdisk /dev/sdc
Device
contains neither a valid DOS partition table, nor Sun, SGI or OSF disklabel
Building
a new DOS disklabel. Changes will remain in memory only,
until
you decide to write them. After that, of course, the previous
content
won't be recoverable.
The
number of cylinders for this disk is set to 1305.
There is
nothing wrong with that, but this is larger than 1024,
and
could in certain setups cause problems with:
1)
software that runs at boot time (e.g., old versions of LILO)
2)
booting and partitioning software from other OSs
(e.g., DOS FDISK, OS/2 FDISK)
Warning:
invalid flag 0x0000 of partition table 4 will be corrected by w(rite)
Command
(m for help): n
Command
action
e extended
p primary partition (1-4)
p
Partition
number (1-4): 1
First
cylinder (1-1305, default 1):
Using
default value 1
Last
cylinder or +size or +sizeM or +sizeK (1-1305, default 1305):
Using
default value 1305
Command
(m for help): w
The
partition table has been altered!
Calling
ioctl() to re-read partition table.
WARNING:
Re-reading the partition table failed with error 16: Device or resource busy.
The
kernel still uses the old table.
The new
table will be used at the next reboot.
Syncing
disks.
[root@oracleasm
~]#
Disk /dev/sdd: 10GB
[root@oracleasm
~]# fdisk /dev/sdd
Device
contains neither a valid DOS partition table, nor Sun, SGI or OSF disklabel
Building
a new DOS disklabel. Changes will remain in memory only,
until
you decide to write them. After that, of course, the previous
content
won't be recoverable.
The
number of cylinders for this disk is set to 1305.
There is
nothing wrong with that, but this is larger than 1024,
and
could in certain setups cause problems with:
1)
software that runs at boot time (e.g., old versions of LILO)
2)
booting and partitioning software from other OSs
(e.g., DOS FDISK, OS/2 FDISK)
Warning:
invalid flag 0x0000 of partition table 4 will be corrected by w(rite)
Command
(m for help): n
Command
action
e extended
p primary partition (1-4)
p
Partition
number (1-4): 1
First
cylinder (1-1305, default 1):
Using
default value 1
Last
cylinder or +size or +sizeM or +sizeK (1-1305, default 1305):
Using
default value 1305
Command
(m for help): w
The
partition table has been altered!
Calling
ioctl() to re-read partition table.
WARNING:
Re-reading the partition table failed with error 16: Device or resource busy.
The
kernel still uses the old table.
The new
table will be used at the next reboot.
Syncing
disks.
[root@oracleasm
~]#
System restart is required to apply all changes.
After system restart we have the following disk partitions
available:
Disk /dev/sdb: 103 MB
–> CRS1
Disk /dev/sdc: 10.7 GB
–> DATA1
Disk /dev/sdd: 10.7 GB
–> FRA1
Creating ASM disks:
[root@oracleasm ~]# /usr/sbin/oracleasm createdisk CRSVOL1
/dev/sdb1
Writing disk header: done
Instantiating disk: done
[root@oracleasm ~]#
[root@oracleasm ~]# /usr/sbin/oracleasm createdisk DATAVOL1
/dev/sdc1
Writing disk header: done
Instantiating disk: done
[root@oracleasm ~]#
[root@oracleasm ~]# /usr/sbin/oracleasm createdisk FRAVOL1
/dev/sdd1
Writing disk header: done
Instantiating disk: done
[root@oracleasm ~]#
[root@oracleasm ~]#
[root@oracleasm ~]# /usr/sbin/oracleasm listdisks
CRSVOL1
DATAVOL1
FRAVOL1
[root@oracleasm ~]#
Test disks discovery(oracle-discovery is being used by the oracle
database creation assistant (dbca))
[root@oracleasm ~]# oracleasm-discover
Using ASMLib from /opt/oracle/extapi/64/asm/orcl/1/libasm.so
[ASM Library - Generic Linux, version 2.0.4 (KABI_V2)]
Discovered disk: ORCL:CRSVOL1 [202720 blocks (103792640 bytes),
maxio 256]
Discovered disk: ORCL:DATAVOL1 [20964762 blocks (10733958144
bytes), maxio 256]
Discovered disk: ORCL:FRAVOL1 [20964762 blocks (10733958144 bytes),
maxio 256]
>> Install and configure Oracle Grid Infrastructure:
Login
as a grid user and execute ./runInstaller.
Select
Install and Configure Grid Infrastructure for a Standalone Server. Click the
Next

Select
the languages for your installation. click the Next

Select
the disk group and click next

Enter sys and asmsnmp: oracle


After
pre-req checks the Summary page displays. Click the next

Click the Finish button to start the
installation.


At the
end of the installation t root scripts will need to be executed. In terminal
window executed the listed root.sh script as the root user.


At this
moment we have Oracle AMS instance and related services up and
running:

>> Creating ASM disk groups for Oracle database installation:
Next we are going to
configure ASM disk groups for Oracle Database installation (+FRA and +DATA)
Again, as a grid user
run asmca (ASM Configuration Assistant)
[grid@oracleasm grid]$ ./asmca


Installing Oracle database software & create database instance choosing ASM disks for data storage
Install Oracle Database 11g software only:


>> Create a database with ASM:
Once the Oracle Software has been installed we can run dbca (Database
Creation Assistant).
NOTE: To avoid
“insufficient privileges” errors during the database creation make sure that grid user belongs also to “dba” OS group:
PRCR-1079:
Failed to start resource ora.orcl.db
ORA-01031:
insufficient privileges
ORA-01031:
insufficient privileges
CRS-2674:
Start of 'ora.orcl.db' on 'test-host' failed
Checking grid
user details:
[oracle@oracleasm
database]$ id grid
Uid=1100(grid)
gid=54321(oinstall) groups=54321(oinstall), 54322(dba), 1200(asmadmin),
1201(asmdba), 1202(asmoper)
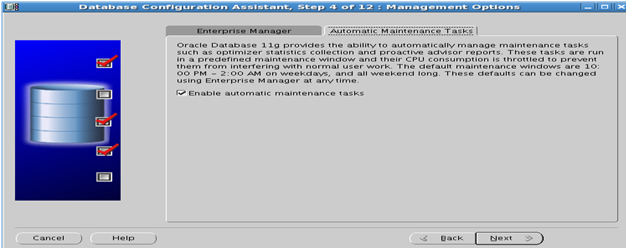
Login as oracle user run dbca and follow database creation wizard:
Hint:-Pay attention to database
control file location in initialization parameter configuration step (place
control files on ASM disks +DATA and copy on +FRA):


SYS,SYSTEM,DBSNMP,SYSMAN:oracle


>> Check the Database datafile, controlfile, tempfile, Redologfile:
[oracle@oracleasm
bin]$ sqlplus / as sysdba
SQL*Plus: Release
11.2.0.1.0 Production on Fri Nov 20 16:08:05 2015
Copyright (c)
1982, 2009, Oracle. All rights reserved.
Connected to:
Oracle Database
11g Enterprise Edition Release 11.2.0.1.0 - 64bit Production
With the
Partitioning, Automatic Storage Management, OLAP,
Data Mining
and Real
Application Testing options
SQL>
select name from V$datafile;
NAME
-----------------------------------------------------------------
+DATA1/orcl/datafile/system.267.896282339
+DATA1/orcl/datafile/sysaux.268.896282341
+DATA1/orcl/datafile/undotbs1.269.896282341
+DATA1/orcl/datafile/users.270.896282341
+DATA1/orcl/datafile/example.276.896282513
SQL>
select name from V$controlfile;
NAME
-------------------------------------------------------------------
+DATA1/orcl/controlfile/current.271.896282477
+FRA1/orcl/controlfile/current.260.896282477
SQL>select
GROUP#,MEMBER from V$logfile;
GROUP# MEMBER
------ -------------------------------------------
3 +DATA1/orcl/onlinelog/group_3.274.896282487
3 +FRA1/orcl/onlinelog/group_3.263.896282487
2 +DATA1/orcl/onlinelog/group_2.273.896282483
2 +FRA1/orcl/onlinelog/group_2.262.896282485
1 +DATA1/orcl/onlinelog/group_1.272.896282479
1 +FRA1/orcl/onlinelog/group_1.261.896282481
SQL>
select name from V$tempfile;
NAME
-----------------------------------------------------------------
+DATA1/orcl/tempfile/temp.275.896282503
SQL>
show parameter spfile
NAME TYPE VALUE
------------------------------------
----------- ------------------------------
spfile string +DATA1/orcl/spfileorcl.ora
SQL>
show parameter pfile;
NAME TYPE VALUE
------------------------------------
----------- ------------------------------
spfile string +DATA1/orcl/spfileorcl.ora
Once
new database has been created we can use sqlplus to connect to a database or
open Enterprise Manager Database Control in our favorite web browser (https://oracleasm.localdomain:
1158/em)

Its
done.....